 Muhammad Niaz Muhammad Niaz Official Website Free Learning Softwares in Urdu Free Download Games Free Download Software Earn Money Online Free Download Mobile apps TV Channel


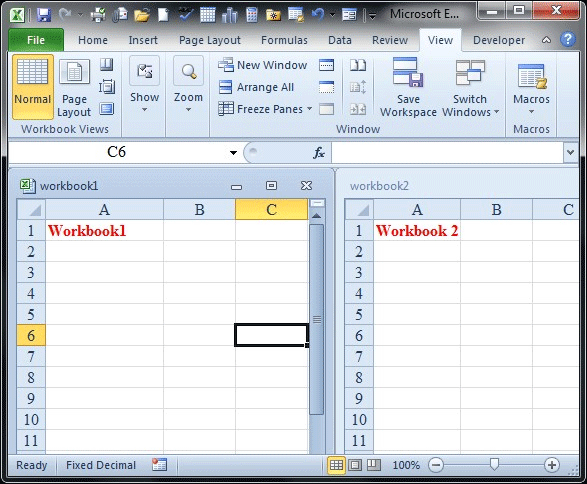
In this video learning tutorial you can learn how to working with multiple workbooks/Sheets Windows in Microsoft Excel 2013 in Urdu and Hindi Language By Sir Muhammad Niaz.
Working with Multiple Worksheets
- YouTube
- Vimeo
Normal – View the document in Normal view.
Page Layout – View the document as it will appear on the printed page. Use this view to see where pages begin and end, and to view any headers or footers on the page.
Page Break Preview – View a preview of where pages will break when this document is printed.
Custom Views – Save a set of display and print settings as a custom view. Once you have saved the current view, you can apply it to the document by selecting it from the list of available custom views.
Full Screen – View the document in full screen mode.
Ruler – View the rulers used to measure and line up objects in the document.
Grid lines – Show, or hide, the lines between rows and columns in the sheet. Showing makes numbers in columns or rows easier to read or edit. Hiding Grid lines is useful if you are making a graphic organizer in Excel. These lines will not print unless the Print box is checked.
Message Bar – Open the Message Bar to complete any required actions on the document.
Formula Bar – View the formula bar in which you can enter text and formulas into cells.
Headings – Show row and column headings. Row headings are the row numbers on the side of the sheet that range from 1 to 1,048,576. Column headings are the letters that appear above the columns on a sheet that range from A to XFD. This is also found on the Page Layout tab of an Excel Workbook.
Zoom – Open the Zoom dialog box to specify the zoom level of the document. In most cases, you can also use the zoom controls in the status bar at the bottom right portion of the window to quickly zoom the document.
100% – Zoom the document to 100% of the normal size.
Zoom to Selection – Zoom the worksheet so that the currently selected range of cells fills the entire window. This can help you to focus on a specific area of the worksheet.
New Window – Open a new window containing a view of the current document.
View Side by Side – View two worksheets side-by-side so that you can compare their contents.
Arrange All – Tile all open program windows side-by-side on the screen.
Synchronous Scrolling – Synchronize the scrolling of two documents so that they scroll together. To enable this feature, turn on View Side by Side.
Freeze Panes – Keep a portion of the sheet visible while the rest of the sheet scrolls.
Reset Window Position – Reset the window position of the documents being compared side-by-side so that they share the screen equally. To enable this feature, turn on View Side by Side.
Split – Split the window into multiple resizable panes containing views of your worksheet. You can use this feature to view multiple distant parts of your worksheet at once.
Save Workspace – Save the current layout of all windows as a workspace so that it can be restored later.
Hide – Hide the current window so that it cannot be seen. To bring the window back, click the Unhide button.
Switch Windows – Switch to a different currently open window.
Macros – View the list of macros, from which you can run, create, or delete a macro. The keyboard shortcut for viewing macros is Alt + F8 .
Microsoft Excel Topic Homepage
Watch Learn and Share with Your Friends


Walikum Salam
http://muhammadniaz.net/category/learnings/microsoft-excel/
Your Most Welcome Dear Also Share with Your Friends
Salam Niaz Bhai,Sir im using blender and its rendering takes many hours can you tell me how to render faster???
Walikum Salam Less Pixel Size
Thanks you v.much your site is awesome! 🙂